16-At-A-Time Half-square Triangles
Half square triangles are one of the most versatile quilt blocks, but if you have to make a lot of them, the process can feel endless. making 16 at a time can speed up the process and let you move on to putting your blocks together more quickly. To get started you will need two squares of fabric. I am working with 9 inch squares that will become 3 and a half inch half square triangles (HST).
To start, take the lighter fabric and turn it onto the wrong side draw a line in the middle going both horizontally and vertically. With a nine inch square I am going to make my lines at the four and a half in mark.

You can use any marking tool is for this. This line that is not going to be in your final half square triangles. I'm using my water erasable pen. Once you've marked the lines, you will place your two squares right sides together.
Next, sew a quarter inch from the drawn line on both sides You will be sewing a total of four lines, two horizontal and two vertical.

Once you have done that, sew a quarter inch around the four sides of the square.

Now it is time to start cutting the fabric to get your HST. I use a rotating cutting mat so that I do not have to move my fabric. I want to very carefully make all of these cuts without the fabric shifting on me.
The first thing we're going to do is cut on the drawn lines.

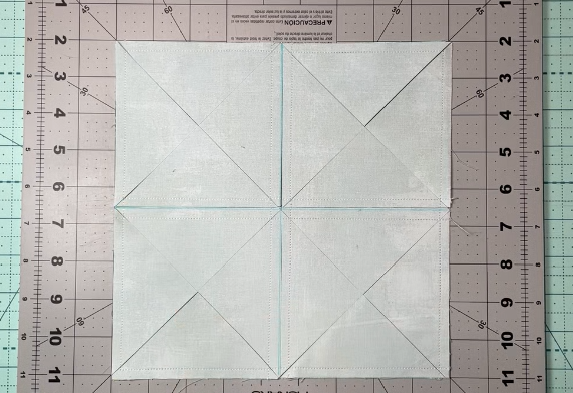
Now the next thing that I'm going to cut is diagonally across the square from corner to corner, cutting an X shape into the fabric. I line up my ruler where the corner of the stitching is where I turned when sewing around the square.

Now for the last set of cuts. Cut from the end of one drawn line diagonally to another, cutting across to the corner. Do this for all four corners creating a diamond shape with your cuts.

Here is what your square will look like once you have done all the cuts.

So there you have it,16 half square triangles! Open them up and press. These were made a bit bigger than I need, so I will trim them down and get rid of the dog ears and then they will be ready for my project!

If you still need help, you can watch the video tutorial on my YouTube channel:
Want to make 2-at-a-time or 4-at-a-time or 8-at-a-time? Click the links to learn how.
Get the Ultimate HST Cutting Chart for free here: Ultimate HST Chart