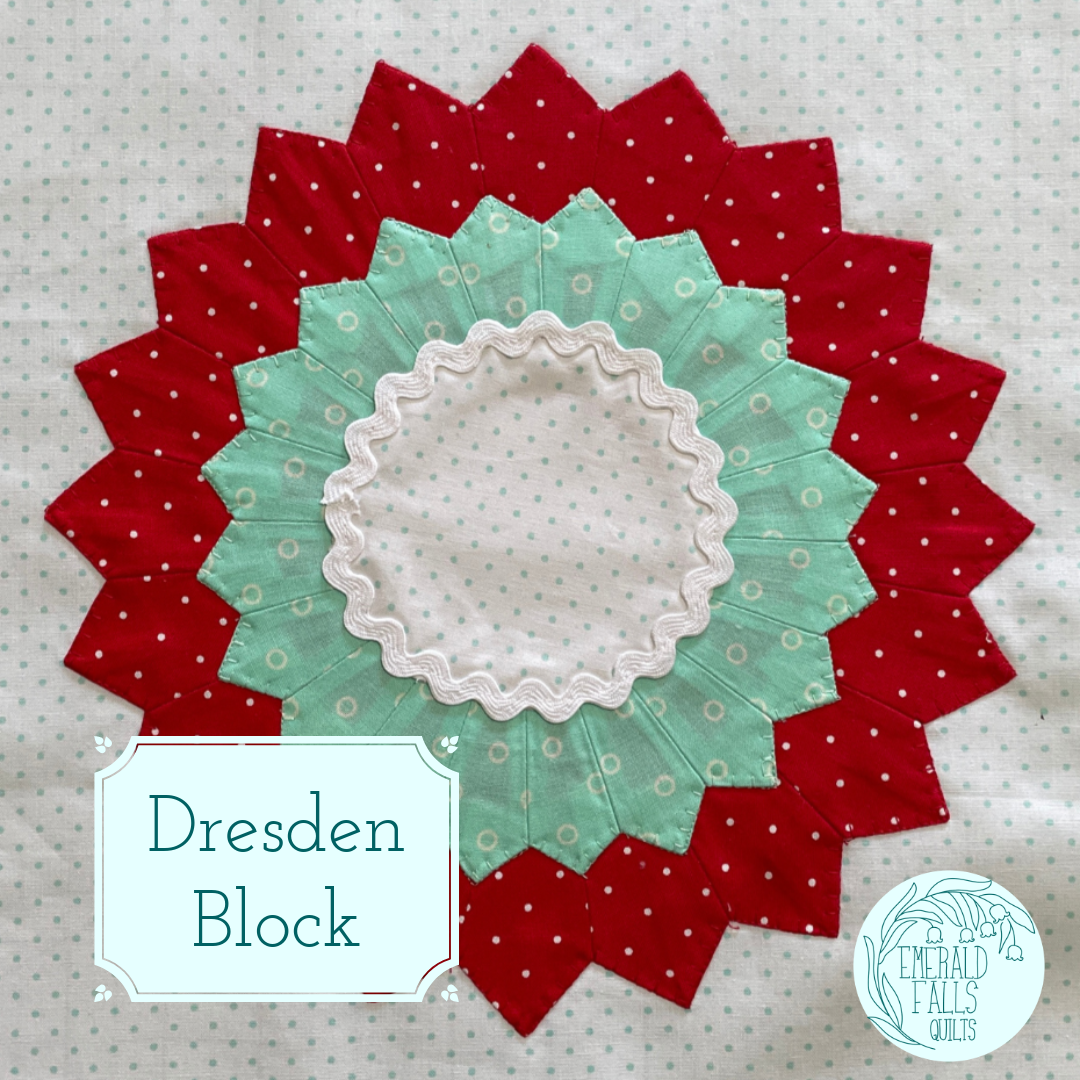
How to Make Dresden Blocks
In this blog post, I'm going to walk you through the basic steps to create a simple Dresden block.
When you download the free pattern, you get the templates and the instructions to make this block with the two Dresdens placed on top of each other. Get the Dresden Pattern

To start making your Dresden block you first need to create your templates. Print out the pattern templates. Cut out the templates and trace the shape onto a thick piece of cardboard.

You can also use a non-slip plastic template sheet.
However, if you're planning to make a lot of Dresdens, I actually recommend getting a ruler. I use the Easy Dresden Ruler by Darlene Zimmerman with Easy Quilting. This ruler gives measurements for multiple Dresdens sizes, and the acrylic makes it really easy to use.

First, cut a strip of fabric that is the width of your Dresden. For the examples below, my Dresden is going to be 4". Line up the ruler so that the bottom os on one edge of the fabric and the top lines up with the ruler marking for the width of your fabric. Cut off the first edge to create the angle of the triangle.

Flip the ruler and fabric. Line up the top, bottom, and angled edge. Cut to create the first blade.

Flip the ruler in the opposite direction. Line up the angle, top, and bottom. Cut. Keep flipping the ruler and cutting out your blades until you have twenty blades total.

Next is to sew the blades to get the points. Fold the long edges of the blade so that the right sides are together. Sew a quarter inch across the top. When I'm sewing my blades, I will sew from the raw edge to the folded edge. Repeat with all 20 blades.

Once you have sewn across the top of all 20 of your blades, it's time to flip them. But first, cut the corners of the folded just a little bit. Make sure you don't get too close to the sewn line.

Now let's flip. I often will use a pair of scissors to help me flip. Take the scissors and put the point along the folded edge Line the the edge of my scissors along edge of the sewn line. Use the scissors to help pull and pop the center to a nice sharp point.

I also use an appliqué point turner to help press the corners out. You want those corners to be nice and pointy and sharp. You also want to be careful that you don't push too hard because you don't want to accidentally pop a hole through your corner.
Once you've flipped your blades, turn your blade to the back center the sewn line on the center of the blade. It doesn't matter which way the seam allowance goes. Use the appliqué point turner to push the corner out. Press the blade.

Once you have all of your blades turned and pressed, it's time to start putting them together. With right sides together, line up the corner where the fabric is folded. If the bottom doesn't completely line up, it is okay. Getting the folded edges aligned is more important. Sew 1/4" along the long edge. Sew the blades together in groups of 5.

Next, put two groups together to make ten blades and form a half circle. Repeat with the remaining two groups to make a second half circle.

Then sew the two halves together to create the full circle of 20 blades. The center circle will have a raw edge.
Once you have your entire plate complete, you're going to appliqué it to your background fabric. To put your plate onto your background fabric, you can appliqué it in many different ways. I usually do a machine blanket stitch around the edges, but you can also just do a straight stitch a quarter or an eighth of an inch inside the blade.

You can also hand appliqué them down, or you can do decorative stitches. The possibilities for applique are endless.
Now that the plate is on the background fabric, you need to decide what you're going to do with the center. Typically, a circle is appliquéd to the center to cover the raw edges. The pattern has a circle template that you can use. I added the ric-rac for added texture, but you can simply appliqué it the same way you appliquéd the plate.

You can also just turn the edges of the circle under about a quarter of an inch and blanket stitch around the inside.

Another fun option for the center (and something to do before you sew your blades together) is also make points at the bottom, by sewing a straight line across the bottom, just like you do the top and then flipping it.

Now your your Dresden plate is done! You can just take this one plate and make it into a small quilt for a wall hanging, or you can make lots and lots and lots of plates and create a whole full size quilt if you wish.
I hope you had fun learning how to make the Dresden block with me, and it has inspired you to make something beautiful.
Prefer a video? Watch this one to learn how to made a Dresden block:
